
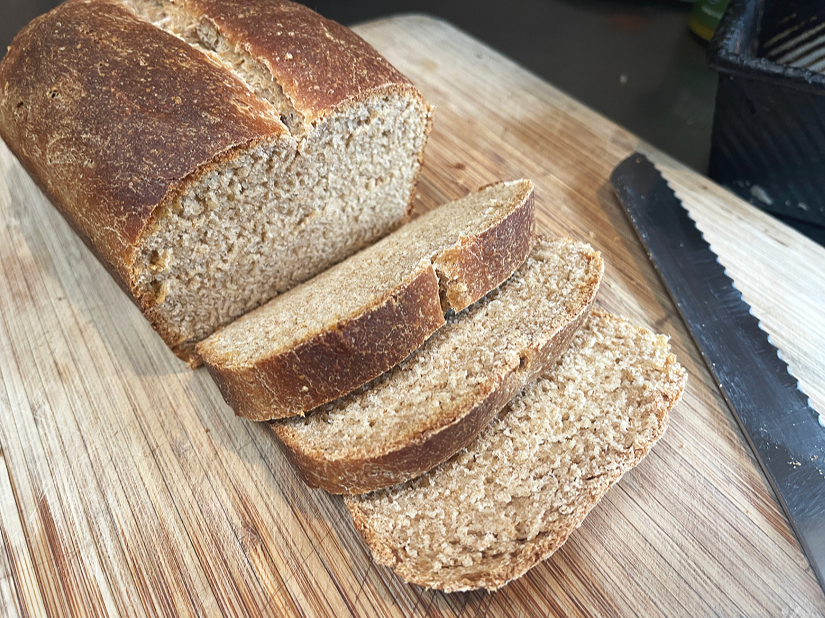
Shio Koji Bread
As you can see from the list of ingredients, this is NOT a gluten-free recipe.
Occasionally, I do make edibles that contain wheat flours if they are fermented. And in this case, the dough is embellished with Shio Koji (a fermented powerhouse flavoring), and the bread dough is lightly fermented for 8 hours, or overnight.
Ingredients
2 tsp dry yeast
3/4 cup filtered water
2 Tablespoons homemade Shio Koji
1 Tablespoon sugar + ¼ teaspoon sugar
2 egg yolks
1-2/3 cups (200g) bread Flour
1-3/4 cups (210g) whole wheat flour
2 Tablespoons extra virgin olive oil
Equipment
9 x 5 bread pan
Stand mixer and bowl with hook attachment
Parchment paper
Damp kitchen towel
Bowl
Directions
1.Warm the water to between 110° – 115° F. Add the ¼ tsp sugar and dissolve. Then stir in the yeast and let it rest for about 10 minutes to activate.
2. Add the egg yolks, sugar, and shio koji to the bowl of a stand mixer and cream together the ingredients with a spatula or wooden spoon.
3. Attach the bowl to the stand mixer and add in the flours and yeast mixture.
4. Use the dough hook attachment and turn the mixer on medium speed, and mix for about 5 minutes.
5. Stop the mixer, and add the olive oil. Turn the mixer on again at low speed to incorporate the oil for about 30 seconds. Turn the mixer off.
6. Using a clean hand, gently knead the olive oil into the dough for 30 seconds.
7. Turn the mixer back on and run it on low speed for another 2 minutes.
8. Turn the dough onto a lightly floured surface and shape it into a smooth ball.
9. Place the dough into a lightly oiled bowl, and cover with a damp cloth.
Let the dough rise in a warm place (around 90° F), or in a bread proofing box for 45 minutes.
10. While waiting for the dough to proof, prepare the loaf pan by lining it with two overlapping pieces of parchment, and very lightly brush with olive oil. Set aside.
11. After the dough has risen, turn it onto a lightly floured surface, gently deflate the dough, and shape it into a loaf to fit the 9 x 5 pan.
Note: There should be about 1” gap between the loaf and the sides of the bread pan.
12. Cover the pan with cling wrap, or beeswax food wrap, and place in the fridge for the second proofing for a minimum of 8 hours, or up to 24 hours.
13. When ready to bake, take the pan out of the fridge and remove the wrap.
Using a sharp knife, cut a shallow slit down the middle (lengthwise).
Let the dough rest at room temperature for 15 minutes.
Meanwhile, preheat the oven to 400° F.
14. When ready, place the pan in the middle rack of the oven and bake for 10 minutes. Then lower the temperature to 350° F and continue baking for approximately 15–20 minutes.
15. The loaf is done when the internal temperature reaches around 195° F.
Recipe credit:
Adapted from a recipe at www.frenchheritagecuisine.com